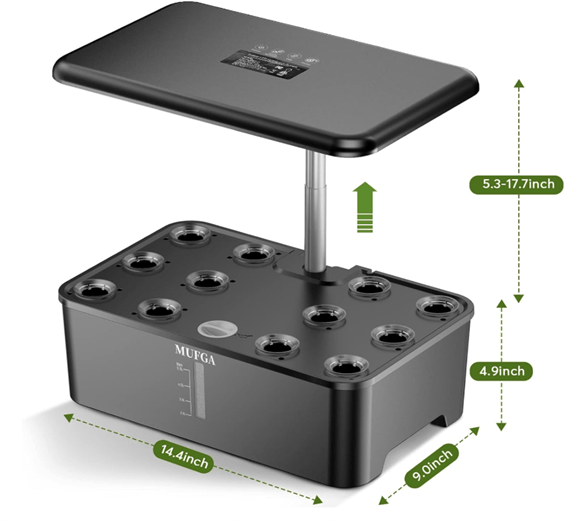
This will be a longer-than-usual post, since I will try to include all the steps I used to grow salad ingredients in a compact (AeroGarden-type) hydroponics system. I hope this encourages readers to try this for themselves. See my previous post for an introduction to the hardware, including small modifications I made to it. I used a less-expensive ($45), reliable 18-hole MUGFA model here, but all the AeroGardens and its many knockoffs should work similarly. Most plant roots need access to oxygen as well as to water; these hydroponic units allow the upper few inches of the root to sit in a (moist) “grow sponge” up out of the water to help with aerobic metabolism.
Step 1. Unbox the hydroponics unit, set up per instructions near a power outlet. Fill tank close to upper volume marking.
Step 2. Add nutrients to the water in the tank: usually there are two small plastic bottles, one with nutrient mix “A” and the other with nutrient mix “B”, initially as dry granules. Add water to the fill lines of each of these bottles with the granules, shake till dissolved. (You can’t mix the A and B solutions directly together without dilution, because some components would precipitate out as solids. So, you must add first one solution, then the other, to the large amount of water in the tank.)
There is more than one way to do this. I pulled the deck off the tank, used a large measuring cup to get water from my sink into the tank, a little below the full line. For say 5 liters of water, I add about 25 ml of nutrient Solution A, stir well, then add 25 ml of Solution B and stir. You could also keep the deck on, have the circulation pump running, and slowly pour the nutrient solutions in through the fill hole (frontmost center hole in the deck). You don’t have to be precise on amounts.
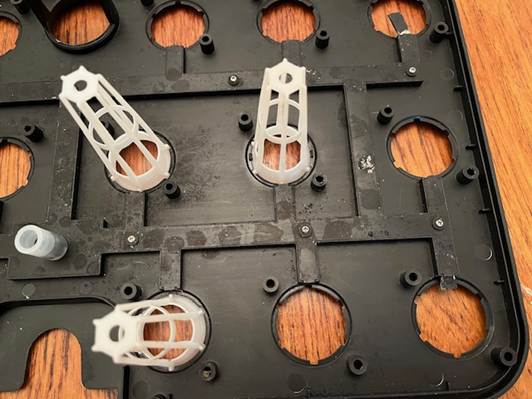
Step 3. Put the plastic baskets (sponge supports) in their holes in the deck, and put the conical porous planting sponges/plugs in the baskets. Let the sponges soak up water and swell. (This pre-wetting may not be necessary; it just worked for me).
Step 4. Plant the seeds: Each sponge has a narrow hole in its top. You need to get your seed down to the bottom of the hole. I pulled one moist sponge out at a time and propped it upright in a little holder on a table where I could work on it. I used the end of plastic bread tie to pick up seeds from a little plate and poke them down to the bottom of the hole. You have to make a judgment call how many seeds to plant in each hole. Lettuce seeds are large and pretty reliable, so I used two lettuce seeds for each lettuce sponge. Same for arugula (turns out that it was better to NOT pre-soak the arugula seeds, contrary to popular wisdom). If both seeds sprout, it’s OK to have two lettuce plants per hole, though you may not get much more production than from one plant per hole. For parsley*, where I wanted 2-3 plants per hole, I used three seeds each. For the tiny thyme seeds, I used about 5 seeds, figuring I could thin if they all came up. For cilantro, I used two pre-soaked seeds. I really wanted chives, but they are hard to sprout in these hydroponics units. I used five chive seeds each in two holes, but they never really sprouted, so I ended up planting something else in their holes.
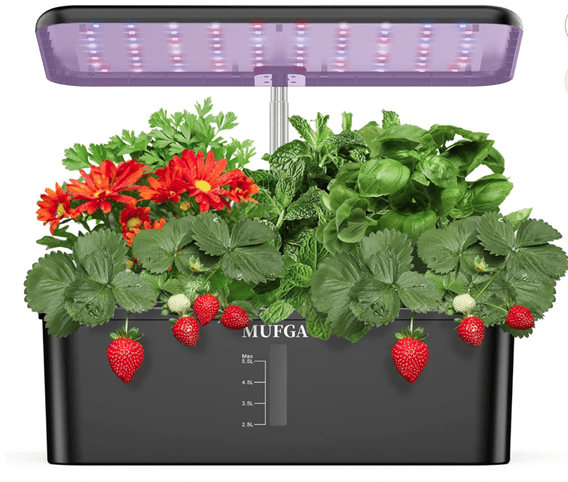
I chose all fairly low-growing plants, no basil or tomatoes. Larger plants such as micro-dwarf tomatoes can be grown in these hydroponics units; also basil, though need to aggressively keep cutting it back. It may be best to choose all low or all high plants for a given grow campaign. See this Reddit thread for more discussion of growing things in a MUGFA unit.
Once all the plugs are back in their holders, you stick a light-blocking sticker on top of each basket. Each sticker has a hole in the middle where the plants can grow up through, but they block most of the light from hitting the grow sponge, to prevent algae growth. Then pop a clear plastic seeding cover dome on top of each hole, and you are done. The cover domes keep the seeds extra moist for sprouting; remove the domes after sprouting. Make sure the circulation pump is running and the grow lights are on (typically cycling on 16 hours/off 8 hours). This seems like a lot of work describing it here, but it goes fast once you have the rhythm. Once this setup stage is done, you can just sit back and let everything unfold, no muss, no fuss. Here is the seeded, covered state of affairs:

Picture: Seeds placed in grow sponges on Jan 14. Note green light-blocking stickers, and clear cover domes to keep seeds moist for germination. The overhead sunlamp has a lot of blue and red LEDs (which the plants use for photosynthesis), which gives all these photos a purple cast.

Jan 28 (Two weeks after planting): seedlings. Note some unused holes are covered, to keep light out of the nutrient solution in the tank. The center hole in front is used for refilling the tank.
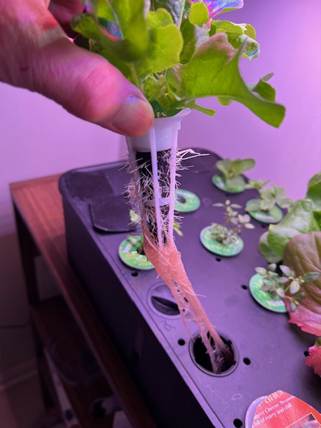
Feb 6. Showing roots of an arugula plant, 23 days after planting.
Step 5. Maintenance during 2-4 month grow cycle. Monitor water level via viewing port in front. Top up as needed. Add nutrients as you add water (approx. 5 ml of Solution A and 5 ml Solution B, per liter of added water). The water will not go down very fast during the first month, but once plants get established, water will likely be needed every 5-10 days. If you keep trimming outside leaves every several days, you can get away with having densely planted greens, whereas if you only harvest say every two weeks, the plants get so big they would crowd each other if you plant in every hole on the deck.
Optional: Supposedly it helps to keep the acidity (pH) of the nutrient solution in the range of 5.5-6.5. I think most users don’t bother checking this, since the nutrient solutions are buffered to try to keep pH in balance. Being a retired chemical engineer, I got this General Hydroponics kit for measuring and adjusting pH. On several occasions, the pH in the tank was about 6.5. That was probably perfectly fine, but I went ahead and added about 1/8 teaspoon of the pH lowering solution, to bring it down to about 6.0. I also got a meter for measuring Electrical Conductivity/Total Dissolved Solids to monitor that parameter, but it was not necessary.
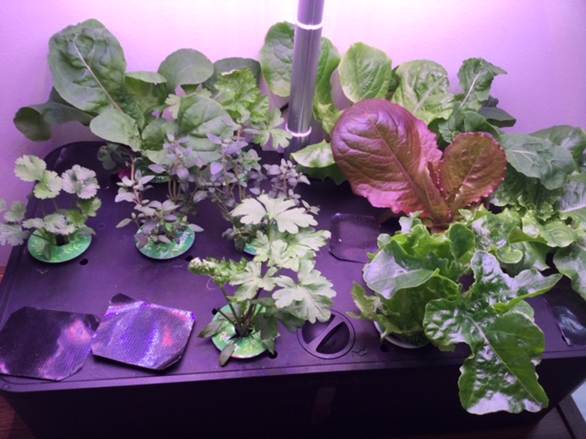
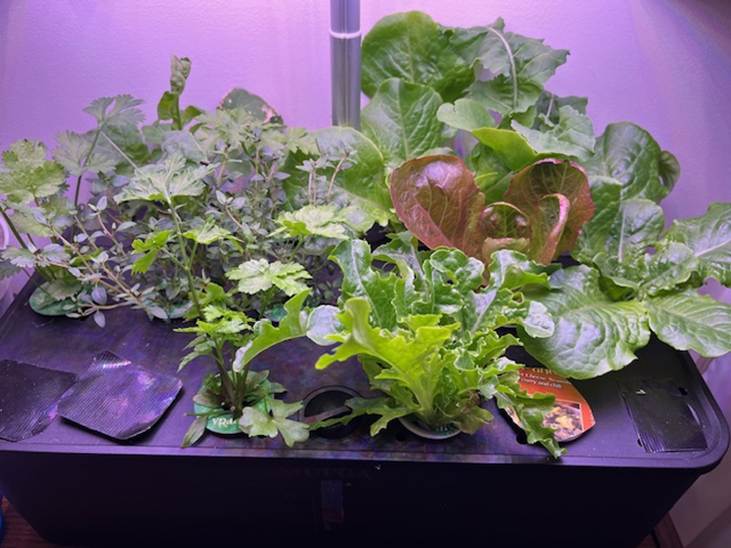
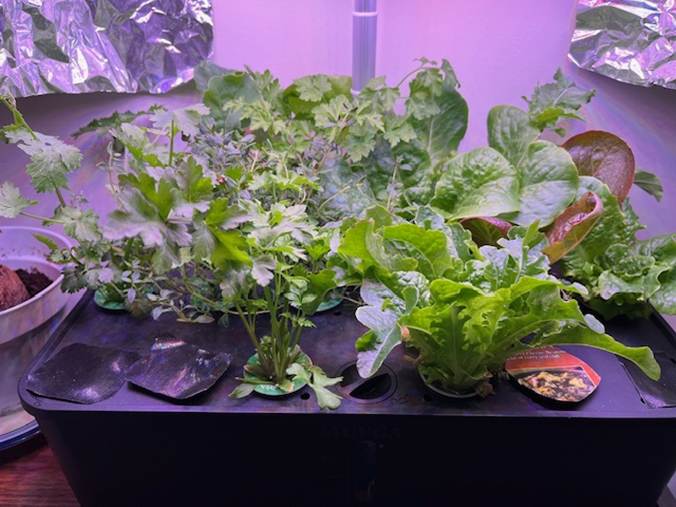
Feb 16: After a month, some greens are ready to snip the outer leaves. Lettuces (buttercrunch, red oak, romaine) on the right, herbs on the left.
~~~~~~~~~~~~~~~~~~~~~~~~~~~~~~~~~~~~~~~~~~~
Feb 17: Harvesting a small salad or sandwich filler every 2-3 days now.
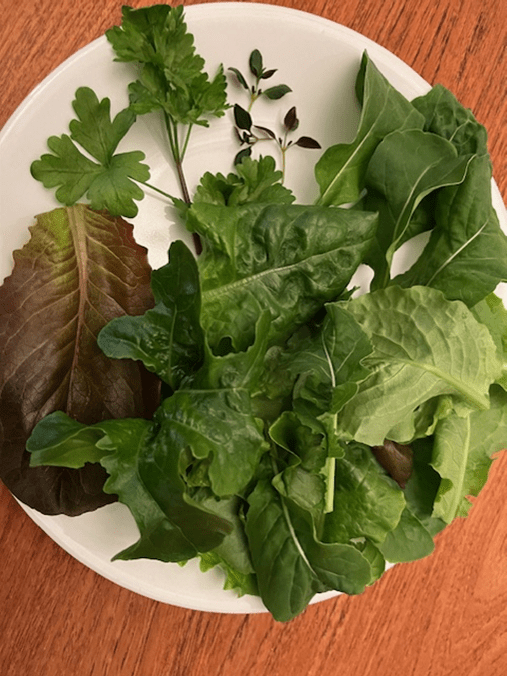
March 6: Full sized, regular small harvests. All the lettuces worked great, buttercrunch is especially soft and sweet. Arugula (from the mustard plant family) gave a spicy edge. Italian parsley and thyme added flavor. The cilantro was slower growing, and only gave a few sprigs total.
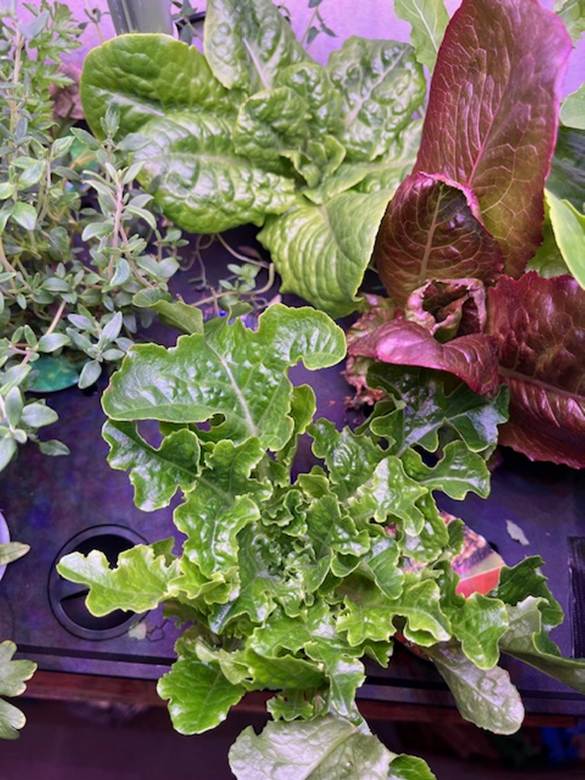
Closeup March 16 (three months), just before closing out the grow cycle. Arugula foreground, lettuce top and right, thyme on left, Italian parsley upper left corner.
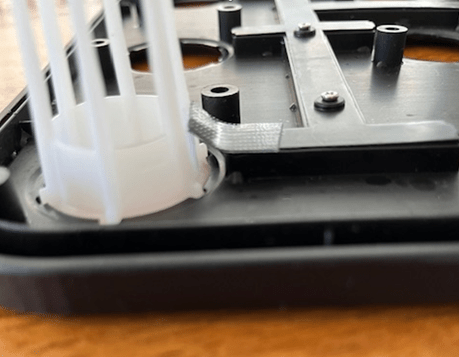
Step 6. Close out grow cycle. At some point, typically 2-4 months, it is time to bring a grow cycle to a close. I suppose with something like dwarf tomatoes, you could keep going longer, though you might need to pull the deck up and trim the roots periodically. In my case, after three months, the arugula and cilantro were starting to bolt, though the lettuce, thyme, and parsley were still going strong. As of mid-March, my focus turned to outside planting, so I harvested all the remaining crops on the MUGFA, turned off the power, and gently pulled the deck off the tank. The whole space under the deck was a tangled mass of roots. I used kitchen shears to cut roots loose, enough to pull all the grow sponges and baskets out. The sponges got discarded, and the baskets saved for next time. I peeled off and saved the round green light-blocking stickers for re-use. I cleared all the rootlets from the filter sponge on the pump inlet. Then I washed out the tank per instructions. It took maybe 45 minutes for all this clean-out, to leave the unit ready for a next round of growing.
Stay tuned for a future blog post on growing watercress, which went really well this past fall. Looking to the future: In Jan 2026 I plan to do a replant of this 18-hole (blocked down to 14-holes) MUGFA device, sowing less lettuce (since we buy that anyway) but more arugula/Italian parsley/thyme for nutritious flavorings. For replacement nutrients and grow sponges, I got a Haligo hydroponics kit like this (about $12).
Growing these salad/sandwich ingredients in the kitchen under a built-in sunlamp provided good cheer and a bit of healthy food during the dark winter months. The clean hydroponic setup removed concerns about insect pests or under/overwatering. It was a hobby; at this toy scale it did not “save money”, though from these learnings I could probably rig a larger homemade hydroponics setup which might reduce grocery costs. This exercise led to fun conversations with visitors and children, and was a reminder that nearly everything we eat comes from water, nutrients, and light, directly or indirectly.
*Pro tips on germinating parsley seeds – – Parsley seeds have a tough coating, and can take weeks to germinate. Some techniques to speed things up:
( 1 ) Lightly abrade the seeds by gently rubbing between sheets of sandpaper.
( 2 ) Soak in warmish water for 24-48 hours.
( 3 ) For older seeds, cold stratification (1–2 weeks in a damp paper towel in the fridge) may help break dormancy.